Introduction to Snowboard Boot Repair
As avid snowboarders, we all know the importance of having well-maintained gear. Our boots in particular take a beating on the slopes, and over time, they can develop issues that affect our performance and comfort. That’s why understanding the basics of snowboard boot repair is essential for any rider who wants to get the most out of their gear.
Why Snowboard Boot Repair is Important
Snowboard boots are subjected to a lot of stress and strain during riding. From the constant flexing and pressure of carving turns to the impacts of jumps and rough terrain, our boots have to withstand a lot. Over time, this wear and tear can lead to problems like rips, tears, and separated soles.
If left unaddressed, these issues can worsen, causing discomfort, reduced performance, and even premature failure of the boots. By learning some basic snowboard boot repair techniques, we can extend the life of our gear and ensure that our boots are always performing at their best.
Common Issues with Snowboard Boots
Some of the most common problems that snowboarders encounter with their boots include:
- Rips and tears on the outer shell, particularly in high-stress areas like the toe box and instep
- Separated soles, where the outsole begins to peel away from the upper
- Worn lace holes or frayed laces
- Compressed or broken down liner padding
- Damaged or malfunctioning boa systems
Essential Tools and Materials for Snowboard Boot Repair
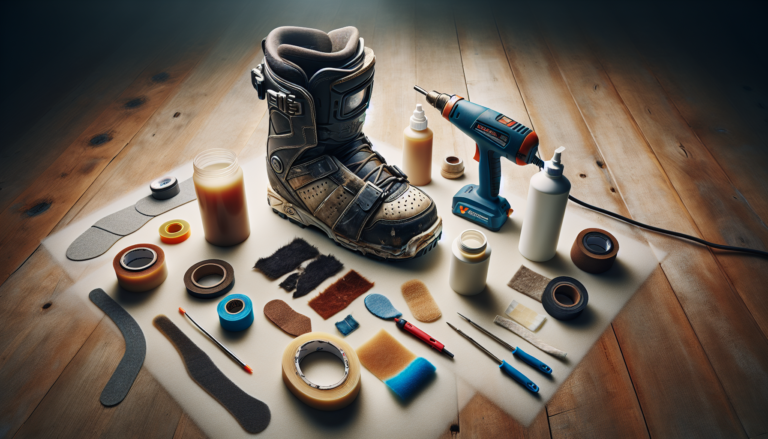
To effectively repair your snowboard boots, you’ll need to have the right tools and materials on hand. Here are some of the essentials:
Adhesives: Shoegoo, Epoxy, and More
Adhesives are the cornerstone of most snowboard boot repairs. They allow you to reattach separated soles, patch holes and tears, and reinforce high-wear areas. Some of the most popular and effective adhesives for boot repair include:
- Shoegoo – A versatile and strong adhesive that works well for patching and rebuilding worn areas
- Epoxy – A two-part adhesive that provides a strong, waterproof bond, ideal for sole repairs
- Aquaseal – A flexible urethane adhesive that remains pliable in cold temperatures
- Shoe repair adhesives – Various specialized glues designed for use on footwear
Tapes: Gorilla Tape, Tenacious Tape, and Duct Tape
In addition to adhesives, various heavy-duty tapes can be used for temporary repairs or reinforcing repaired areas. The most commonly used tapes for boot repair include:
- Gorilla Tape – An extremely strong, all-weather tape that adheres well to most surfaces
- Tenacious Tape – A flexible, abrasion-resistant tape often used for patching outerwear
- Duct Tape – A strong, multipurpose tape that can work in a pinch, but isn’t a long-term fix
It’s a good idea to have a selection of tapes in your repair kit, as different situations may call for different types of tape.
Step-by-Step Guide to DIY Snowboard Boot Repair
With the right tools and a little know-how, many common snowboard boot issues can be repaired at home. Here’s a step-by-step guide to some of the most typical repairs:
Repairing Rips and Tears
- Clean the area around the rip or tear with alcohol to remove dirt and oils.
- If the rip is large, use a piece of Tenacious Tape on the inside of the boot to close the tear and provide a backing for the adhesive.
- Apply a generous amount of Shoegoo or similar adhesive to the torn area, smoothing it out to create an even patch.
- Allow the adhesive to dry completely, usually 24-48 hours.
- Once dry, the patch can be sanded or trimmed if needed to create a smooth, seamless repair.
Fixing Separated Soles
- Clean the separated sole and upper with alcohol to remove dirt and old adhesive.
- If necessary, roughen the surfaces to be glued with sandpaper to improve adhesion.
- Apply a two-part epoxy or urethane adhesive to both the upper and sole.
- Press the sole firmly back into place, wiping away any excess glue.
- Clamp or tape the sole in place to ensure a tight bond while the glue dries.
- Allow 24-48 hours for a complete cure before using the boots.
Reinforcing Worn Areas
- Clean the area to be reinforced with alcohol.
- Apply a layer of adhesive, like Shoegoo, to the worn spot, building it up slightly thicker than the surrounding material.
- Use a putty knife or popsicle stick to smooth and shape the glue.
- If needed, a patch of Tenacious Tape can be applied over the glued area for additional strength.
- Let the repair dry completely before using the boots.
Professional Repair Services for Snowboard Boots
For more complex repairs or issues beyond your DIY abilities, there are professional services available.
Local Shops and Their Services
Many local snowboard shops offer repair services for boots and other gear. Advantages of using a local shop include:
- Convenient drop-off and pick-up
- Face-to-face consultation with experienced repair technicians
- Quick turnaround times, often just a few days
- Support for the local snowboard community and economy
Manufacturer Repair Options
For warranty-covered issues or repairs that require specialized equipment and knowledge, you can also send your boots back to the manufacturer. For example, Burton offers a comprehensive repair program for their products.
Advantages of using manufacturer repair services include:
- Highly trained technicians with intimate knowledge of the products
- Access to original replacement parts and materials
- Repairs backed by the manufacturer’s warranty
- Often less expensive than buying new boots
The main drawback is the time required for shipping boots back and forth, which can take several weeks in some cases.
Preventative Maintenance Tips for Snowboard Boots
Of course, the best way to deal with snowboard boot issues is to prevent them from happening in the first place. Here are some tips for maintaining your boots and preventing common problems:
Regular Cleaning and Inspection
Get in the habit of cleaning your boots after each use, removing dirt, salt, and debris that can cause damage over time. Inspect the boots for signs of wear, paying close attention to high-stress areas like the toe box, instep, and soles. Catching small issues early can prevent them from turning into bigger problems down the road.
Proper Storage Techniques
When storing your boots between seasons, make sure they are clean and completely dry to prevent mold and mildew growth. Remove the liners and footbeds, and stuff the boots with newspaper to absorb moisture and maintain their shape. Store them in a cool, dry place away from direct sunlight, which can degrade materials over time.
Conclusion
Summary of Key Points
Snowboard boot repair is an essential skill for any serious rider. By understanding the common issues that can arise and having the right tools and materials on hand, you can keep your boots performing at their best season after season. Remember to:
- Regularly clean and inspect your boots for signs of wear
- Use adhesives like Shoegoo and epoxy for patching and sole repairs
- Reinforce high-wear areas to prevent further damage
- Consider professional repair services for complex issues
- Practice proper maintenance and storage to prevent problems
Final Thoughts
Taking care of your snowboard boots is an investment in your riding performance and enjoyment. By learning some basic repair skills and staying on top of maintenance, you can extend the life of your boots and ensure that they’re always ready to deliver their best on the mountain. So take the time to familiarize yourself with these techniques, build a solid repair kit, and keep your boots in top shape – your feet will thank you!


